Bad lighting, cluttered rooms, and awkward angles reduce enquiries by up to 40%. Most agents can't afford a professional photographer for every single instruction. Here's what to do instead.
You've written a solid description. The price is right. The location sells itself. And yet, nothing. The phone isn't ringing. The portal views are trickling in, but enquiries are flat.
Before you drop the price, check the photos.
Research consistently shows that listings with poor photography receive significantly fewer enquiries than comparable properties with better visuals. We're talking up to 40% fewer click-throughs, fewer bookings, fewer offers. In a market where buyers are scrolling through dozens of listings in minutes, your photos are doing the selling before a single word gets read.
The problem is, most agents in the UK are expected to list properties quickly and cost-effectively. Hiring a professional photographer for every instruction isn't always realistic. So photos get taken on phones, in a rush, before the vendor has cleared the kitchen counter, and the listing quietly underperforms.
This article breaks down the five most common real estate photography mistakes UK agents make, what those mistakes are costing you, and what you can actually do about each one, without necessarily booking a photographer every time.
Mistake #1: Bad Lighting
Dark Photos Kill First Impressions Before Anyone Reads the Description
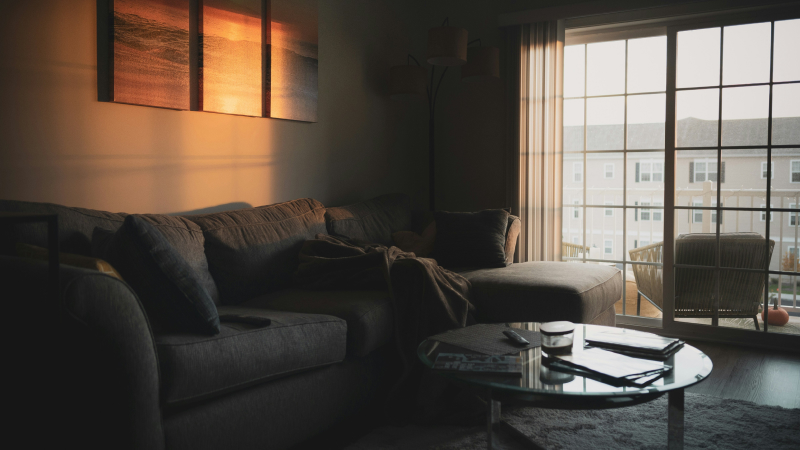
Lighting is the single most important factor in how a room photographs. More than furniture. More than space. More than decor. A beautifully furnished room shot in bad light looks cold, small, and neglected. A modest room shot in good light looks warm, spacious, and inviting.
The most common lighting mistake is shooting into windows. It seems logical, face the camera toward natural light, but the result is a blown-out background that the camera can't balance, leaving the room itself dark and underexposed. You end up with a bright rectangle of white where the window should be and a murky silhouette of everything else.
This is a particular challenge in the UK. Overcast skies, north-facing rooms, Victorian terraces with small sash windows, basement flats, the light is often working against you. Add a vendor who's drawn the blinds because they don't want the neighbours looking in, and you've got a photographic disaster waiting to happen.
What bad lighting signals to a buyer is subtle but powerful: this place is dark. This place is small. This place feels unloved. None of that may be true, but the photo has already made the case.
The fix:
Timing matters more than equipment. South-facing rooms photograph best in the morning when direct sun fills the space without glare. North-facing rooms are better at midday. For most properties, it's worth a five-minute conversation with the vendor about when to schedule the shoot.
On the day: every light source on. Lamps, ceiling lights, under-cabinet lighting, all of it. You're not trying to fake brightness; you're supplementing natural light and evening out the exposure. Open every blind and curtain fully.
When the light genuinely can't be fixed on the day, and sometimes it can't, there are now practical post-processing options. AI-powered tools like VirtualStagingExpert can correct exposure, enhance natural light, and even replace a dull grey sky with a bright blue one, giving the exterior and garden shots the lift they deserve without a reshoot. More on that in a moment.
Mistake #2: Cluttered Rooms
Buyers Buy Space. Clutter Sells the Opposite.
Here's the psychology: when buyers look at listing photos, they're not seeing the property as it is. They're trying to visualise themselves living there. That mental projection is virtually impossible when someone else's life is covering every surface.
A kitchen counter covered in appliances, mail, and condiment bottles doesn't read as "functional kitchen." It reads as "no space." A living room with toys, cables, overflowing bookshelves, and a dog bed doesn't read as "family home." It reads as "cramped."
The tricky part is that vendors genuinely don't see it anymore. They live there. The cluttered counter is normal to them. The pile by the door is just where they put things. Getting them to clear the space before the shoot requires a conversation you've probably had to navigate carefully once or twice.
This is one of the most direct answers to the question agents ask us all the time: why is my property listing getting no viewings? In many cases, it's simply that the photos are making the rooms feel smaller and more chaotic than they are.
The fix:
Create a pre-shoot checklist and send it to the vendor at least 24 hours before. It doesn't have to be long. Clear kitchen surfaces. Put away personal photos and paperwork. Make the beds, close the toilet lids, hide the bins. Tuck away phone chargers and cables. Move the dog bed.
Frame it positively, tell them it's exactly what professional photographers ask for, because it is.
When the vendor won't cooperate, or when the property is tenanted and you can't stage it yourself, virtual clutter removal is a genuinely viable option. VirtualStagingExpert can digitally remove objects from a photo, the pile of shoes by the door, the overloaded dining table, the kids' toys in the corner, and fill in the space underneath realistically. You end up with a clean, spacious-looking photo without anyone having to move a thing.
For empty or sparsely furnished properties, virtual staging can take the opposite approach: adding furniture and decor digitally to help buyers see the potential of a blank space. For new builds and vacant lettings especially, this can be the difference between a listing that sits and one that moves.
Mistake #3: Wrong Angles and Lens Choices
The Camera Position That Makes Every Room Look Like a Cupboard
Most agents photograph rooms from standing height, pointing roughly at the opposite wall. It seems sensible. It is, unfortunately, the angle that makes almost every room look smaller than it is.
Here's why: shooting at eye level cuts the room horizontally. You see the walls but you lose the floor space, which is where the perceived sense of room size actually lives. Lower the camera to chest height, and suddenly the floor opens up, the room feels deeper, and the furniture reads as properly scaled.
The other common mistake is shooting square-on to a wall rather than diagonally across the room. A corner-to-corner diagonal shot captures two walls, the ceiling, the floor, and the full depth of the space. It's the single most effective compositional change a non-photographer can make.
On lens choice, phone cameras have improved dramatically, but the ultra-wide mode that many people instinctively reach for creates barrel distortion that makes straight walls curve at the edges. It reads as unprofessional and slightly untrustworthy, even if buyers can't explicitly identify why. Stick to the standard lens and get closer to the corner rather than trying to capture more with a wider angle.
Portrait orientation is almost never appropriate for room photography. Landscape, always. Portrait crops out the sides of the room and exaggerates vertical space at the expense of horizontal, exactly the wrong trade for most UK properties where ceiling height isn't the selling point but floor space is.
How to photograph rooms to look bigger:
- Camera at chest height or lower, never at standing eye level
- Shoot diagonally from a corner, capturing two walls and the depth of the room
- Include the ceiling in shots where ceiling height is worth communicating
- Landscape orientation in every room, without exception
- Standard lens, not ultra-wide, get closer to the corner instead
Mistake #4: Ignoring the Hero Shot
You've Got 3 Seconds. Your Lead Photo Decides Everything.
On Rightmove, Zoopla, or OnTheMarket, buyers are looking at a grid of thumbnails. One image per listing. Three seconds, maybe less, to decide whether to click or scroll past. That image is your entire first impression. It is your advertisement.
Most agents default to the front exterior as the lead photo, and most of the time, that's probably right, buyers want to know what the building looks like. But not always. A north-facing terrace on a grey morning, wheelie bins out, car blocking the drive? That's not your strongest asset. A stunning open-plan kitchen, a beautifully presented reception room, or a sun-lit rear garden might earn you more clicks.
The hero shot criteria is simple: bright, spacious-feeling, and emotionally aspirational. It should make a buyer think I want to be in that room. Everything else in the listing is secondary.
The fix:
Before you set the lead photo, ask yourself honestly: does this make me want to click? Show it to someone who hasn't seen the property and ask them what they feel. If the answer is "fine" or "it's okay," that's not good enough.
If your listing has been live for a week and enquiries are slow, try swapping the lead photo. It's free, takes two minutes, and occasionally transforms a flat listing. Portal analytics on some platforms will tell you your click-through rate, if it's low relative to comparable listings, the hero shot is almost certainly part of the problem.
For premium listings or properties that need a push, a virtually enhanced or staged version of the hero shot is worth considering, a grey sky replaced, light levels corrected, or a sparse room furnished digitally. The lead photo is the one place where the investment in post-processing pays back fastest.
Mistake #5: No Visual Story or Flow
A Random Order of Rooms Isn't a Tour, It's a Puzzle
When a buyer clicks through your listing photos, they're not just looking at individual rooms, they're trying to build a mental map of the property. They want to take a tour. Random ordering breaks that completely. Starting with the smallest bedroom, bouncing to the bathroom, then to the garden, then the kitchen, means they're reconstructing the floorplan rather than experiencing the property.
This sounds like a small thing. It isn't. Confusion kills interest. If someone can't quickly build a sense of the space from the photos, they'll move on to a listing that's easier to read.
The formula that works is simple: treat the photos like a walk-through.
Front exterior → entrance hall → main reception room → kitchen/dining → garden → primary bedroom → secondary bedrooms → bathrooms → (optional close) a styled lifestyle shot
You're taking the buyer on a journey. The last photo matters almost as much as the first, ending on something aspirational (a beautifully dressed bedroom, a styled kitchen detail, the garden in good light) leaves a positive final impression before they scroll away.
The fix:
Before you publish, spend five minutes reordering the photos with this logic in mind. You don't need new photos to do this, just intentional curation of what you already have.
If you have video, use it. Walkthroughs are growing in prominence on UK portals and social media, and they solve the flow problem entirely, a well-edited tour does the mental work for the buyer. AI-generated videos created from still photos are now a practical option for listings where a video wasn't shot on the day, giving you movement and story without a return visit.
What To Do When You Can't Reshoot
The Listing Is Live and the Photos Are Weak. Now What?
Sometimes a reshoot simply isn't an option. The vendor isn't cooperative. The property is tenanted. The budget doesn't stretch. The listing has been live for three days and you need to do something now.
The traditional answer was: book a photographer and hope the vendor tidies up this time. It's still the best answer when quality is paramount and the circumstances allow. But for the situations where it doesn't, tools like VirtualStagingExpert.com now allow agents to work with the photos they already have. Clutter can be removed digitally. Skies can be replaced. Empty rooms can be furnished virtually. Flat, dim photos can be brightened and corrected. Video can be generated from stills.
It's not magic, and it's not a replacement for the right shot taken properly on the day. But it's a practical bridge between the listing you have and the listing you need, and it's available without a second visit, a separate booking, or a conversation with the vendor.
The key question to ask about any listing is: what's the one thing holding these photos back? Often it's single and fixable, the cluttered kitchen, the grey exterior sky, the dim bedroom. One targeted fix can shift an underwhelming set of photos into something that earns its clicks.
Conclusion
Better Photos = More Enquiries = Faster Sales. Simple Maths.
To recap:
- Bad lighting makes rooms feel cold, small, and neglected, fix it with timing, supplementary lighting, and post-processing where needed
- Clutter stops buyers from imagining themselves in the space, clear it before the shoot, or remove it digitally after
- Wrong angles make rooms look smaller than they are, shoot low, shoot diagonally, shoot landscape
- Ignoring the hero shot wastes the most valuable impression you'll make, choose it with intention
- No visual story confuses buyers and loses interest, sequence your photos like a walkthrough
None of this requires expensive equipment or professional training. It requires intention, a few minutes of thought before and after the shoot that most agents don't take because they're moving fast and listing volume is high.
Go and look at your live listings right now. Not through your eyes, through the eyes of a buyer who's never heard of the property, scrolling on their phone at 9pm. Do the photos make them want to book a viewing?
If not, you know what to do.
Struggling with listings where a reshoot isn't an option? VirtualStagingExpert.com lets UK agents fix lighting, remove clutter, virtually stage empty rooms, and generate video from existing photos, without a return visit.
FAQ
Why is my property getting no viewings?
The most common culprit is listing photos that don't do the property justice. Dark images, cluttered rooms, and awkward angles all reduce click-throughs on portals. Before adjusting the price, review the photos honestly and consider whether they're presenting the property at its best.
How do I make my listing photos look professional without hiring a photographer?
Focus on lighting (all lights on, shoot at the right time of day), decluttering before the shoot, and shooting from a low diagonal angle in landscape orientation. These three changes alone significantly improve most amateur property photos.
Can I fix bad listing photos without organising a reshoot?
Yes. AI-powered tools like VirtualStagingExpert can remove clutter, replace skies, virtually stage empty rooms, and even generate video from existing still photos. It's not a substitute for a well-shot photo, but it's a practical option when a reshoot isn't possible.